Marathon is a tool that helps writing user acceptance tests. This tutorial will cover different aspects of development assisted by tests.
W're going to start with an example of writing user acceptance tests against an application already developed, the calculator application.
In the “tutorial” directory you will find one subdirectory per step.
This version of the tutorial is based on the 0.13 build of Marathon you can download from : http://marathonman.sourceforge.net/download. The tutorial was written on a Windows system (tested on Win98 and Windows 2000).
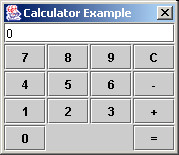
A calculator application was developed and the
result is bundled in a jar file (tutorial/lib/calculator.jar).
Launch it just by double-clicking1
the jar file. Play with the calculator, next figure shows the
application:
Step 1: Write some acceptance tests
We want to write tests for the calculator. We expect the calculator to be able to:
add two values
subtract two values
clear the current value
Let's write a test script to test
addition, start the Marathon IDE (using the start-IDE.bat
file):

create a new empty test (a test is a Python script file)
right click on the current directory (in the left-side tree view)
choose the “New Test From Template” entry
you'll be prompted for the the name (enter testAdd), a file named testAdd.py is created in the directory
Then you'll be prompted to select the script template file (a template file name ends with the mtf extension), select step1/testCalculator.mtf
write the test
goto the line containg the Python pass keyword
remove it
click on the record button in the toolbar (the red circle)
enter "12 + 4 =", the result is displayed (16), if you look at the Marathon IDE you can now see:
                    window('Calculator Example')
                    click('1')
                    click('2')
                    click('+')
                    click('4')
                    click('=')
                    close()
right-click
(on MS-Window systems) in the the text area, to open the contextual
menu,
select
assert text='16'
stop recording (the blue rectangle button), the script now looks like:
                    window('Calculator Example')
                    click('1')
                    click('2')
                    click('+')
                    click('4')
                    click('=')
                    assertText('JTextField', '16')
                    close()
save the
script2
replay the test (click on the green arrow). Change the asserted value to some bad value and see the error report
you can create two more tests: testSubtract and testClear3
                    window('Calculator Example')
                    click('1')
                    click('2')
                    click('-')
                    click('4')
                    click('=')
                    assertText('JTextField', '8')
                    close()
and
                    window('Calculator Example')
                    click('1')
                    click('2')
                    click('-')
                    click('4')
                    click('=')
                    click('C')
                    assertText('JTextField', '0')
                    close()
Step 2: Refactor the Tests
As the Marathon acceptance tests are written in Python scripting language it helps managing the tests as you would do in any programming development: make maintenance easier and reuse of code.
Can we refactor anything in the three test scripts? Let's try. What can we refactor? What don't we like right now?
Writing one more test, without using the recording feature of Marathon, is hard.
Reading the tests to undrestand what is going on is not easy.
Currently the tests is saying: click on the component named '1' (for instance), if we later want to change the name of our component we will have to modify all our scripts
All the scripts start and end with the same sequence...
Wouldn't be easier (or nicer) to write:
                    enter('12')
                    add('4')
                    assertResult('16')
                    close()
instead of
                    window('Calculator Example')
                    click('1')
                    click('2')
                    click('+')
                    click('4')
                    click('=')
                    assertText('JTextField', '16')
                    close()
We need to create some helper methods: enter, add, subtract, clear, assertResult and assertCleared. As we want them to be used by all the scripts, we're going to create a new Python module:
from marathon.playback import *
from defaultFixture import *

def enter(value):
    window('Calculator Example')
    enterValue(value)

def add(value):
    click('+')
    enterValue(value)

def subtract(value):
    click('-')
    enterValue(value)

def clear():
    click('C')

def assertResult(expected):
    click('=')
    assertText('JTextField', expected)

def assertCleared():
    assertText('JTextField', '0')

def enterValue(value):
    for char in value:
            click(char)
Here is some explanation about this script:
The import statements say we are using code from the named modules (marathon.playback and defaultFixture).
The enter method first waits for the calculator main window to be displayed, next calls the enters the value.
The add method first simulates a click on the plus button and the enters the value.
The subtract method first simulates a click on the minus button and the enters the value.
The clear method simulates a click on the clear button.
The assertResult method sumulates a click on the equal button and checks if the current result is equal to the expected value.
The assertCleared method checks if the current result is equal to the current value is zero (meaning cleared)
The enterValue method simulates clicks for all the caracters of the value
Now, we can rewrite the three testing scripts as :
testAdd.py |
|
from step2.util import *

def test():
    enter('12')
    add('4')
    assertResult('16')
    close()
|
testSubstract.py |
|
from step2.util import *

def test():
    enter('12')
    subtract('4')
    assertResult('8')
    close()
|
testClear.py |
|
from step2.util import *

def test():
    enter('12')
    subtract('4')
    assertResult('8')
    clear()
    assertCleared()
    close()
|
Step 3: More Tests...
Now we can write more tests, without even recording user actions.
testAddAndAdd.py |
|
from step3.util import *

def test():
    enter('12')
    add('4')
    assertResult('16')
    add('30')
    assertResult('46')
    close()
|
testAddAndSubtract.py |
|
from step3.util import *

def test():
    enter('12')
    add('4')
    assertResult('16')
    subtract('5')
    assertResult('11')
    close()
|
Now, you can launch the Marathon IDE again, load the new scripts and run them.
Step 4: Automate tests with JUnit
At this stage if we want to run the tests we must start the Marathon IDE and manually open (load) each test script and run it.
Marathon smoothly integrates with JUnit (a regression testing framework), so all the tests scripts can automatically be run à la JUnit. Two helper classes, MarathonTestSuite and MarathonTestCase, are provided in the net.sourceforge.marathon.junit package you can use to start the tests scripts, written in Pyhon, from Java.
Let's write a test suite that uses the scripts written so far4.
package step4;

import junit.framework.Test;
import junit.framework.TestSuite;

import net.sourceforge.marathon.junit.MarathonTestCase;

import java.io.File;
import java.io.FileFilter;
import java.net.MalformedURLException;

public class TutorialTestSuite {
    public static Test suite() {
        TestSuite suite = new TestSuite("Tutorial Acceptance Tests");

        addTests(suite, "step2");
        addTests(suite, "step3");

        return suite;
    }

    private static void addTests(TestSuite suite, String dir) {
        File file = new File(dir);
        File[] files = file.listFiles(new TestScriptFilter());

        for (int i = 0; i < files.length; i++) {
            try {
                suite.addTest(new MarathonTestCase(files[i].toURL()));
            } catch(MalformedURLException me) {
                me.printStackTrace(); // the system has some problem here
            }
        }
    }

    static class TestScriptFilter implements FileFilter {
        public boolean accept(File pathname) {
            return pathname.getName().startsWith("test") && pathname.getName().endsWith(".py");
        }
    }
}
After compiling this file, in theclassdirectory, we can run the tests using thestart-JUnit.batbat file.
You can download the tutorial here and the.
1This should work on Windows with a JRE / JDK 1.2 or later; or use the command line: java -cp calculator.jar calculator.CalculatorDialog
2A cachedir directory was created by Marathon while you ran the recorder
3You can either record them or write the scripts by hand
4The easiest would be to launch JUnit with MarathonTestSuite as starting class, with "-Dtest.name=" option, but as we're using Python modules, without Marathon tests they would fail.